1. Overview
This application note provides direction on utilizing the integrated FTP functionality of the ProPak6 for convenient data extraction from the internal memory. The OEM638 in the ProPak6 contains 4 GB of internal logging memory. Once configured as an FTP server, data can be transferred via Ethernet or Wi- Fi. This allows the ProPak6 to be used in remote environments as a monitoring station. Within this document, the means to add the ProPak6 to an established network through static IP are also explained.
The later portion of this Application Notes details the process involved to transfer data from the ProPak6 to a smart phone. Within this section both iOS and Android examples are provided including configuring either device for static IP to connect to a ProPak6 Access Point Wi-Fi network and configuring third party FTP client applications for connection.
2. Networking Features
1. Port Information
Since the ProPak6 is the first NovAtel receiver that contains both Cellular and WiFi, there has been a change made to the standard port configuration. There are now 4 ICOM ports that are shared between all network connections (Cellular, WiFi, and Ethernet), while COM4 is reserved for Bluetooth.
2. Default IP Configuration
The ProPak6 is not preconfigured with an IP address. Instead, the user must define a unique IP address. This is achieved through the IPCONFIG command. Once an address has been defined, it can be saved to the receiver via SAVETHERNETDATA ETHA. This command overrides the SAVECONFIG command, ensuring preservation of networking settings should the unit be installed at a remote location where the only access available is through a network; after factory reset, or firmware change, network communication will still be possible.
3. Configuring for Static Connection on an Existing Network
In order to configure your receiver with a Static IP address, without having to remove your PC from your existing network framework, you must set an acceptable address with a common network part and unique machine part.
Example 1:
The network portion of your PC IP address can be obtained by opening Command Prompt and sending IPCONFIG.
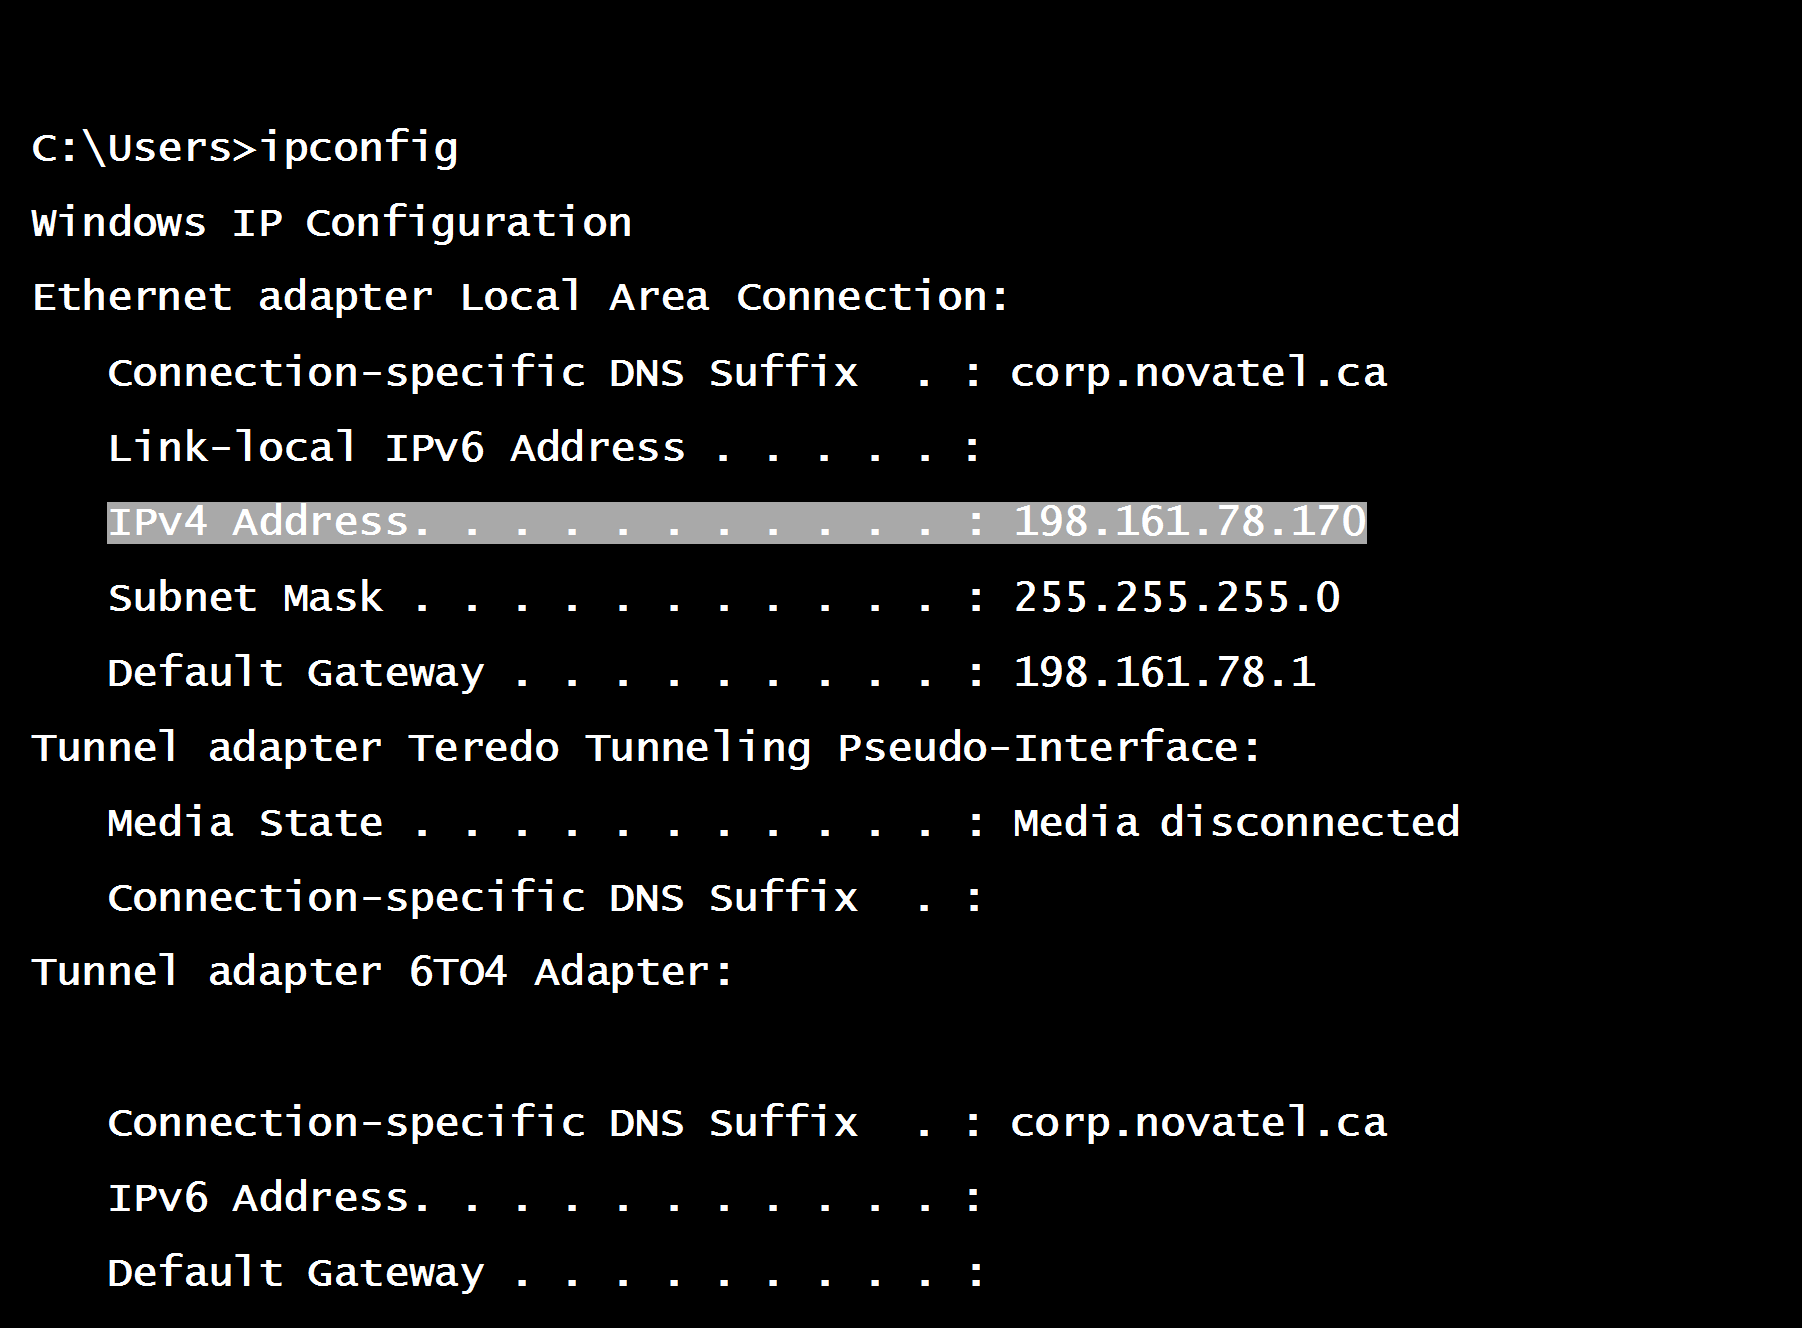 Figure 1: IPCONFIG from PC
The receiver must be set with the same Subnet Mask and Default Gateway as the PC: Subnet mask: 255.255.255.0
Default Gateway: 198.161.78.1
From the highlighted line of the figure above, the IP address can be broken down into its two parts:
Network Part:
192.161.78
Machine Part:
170
The ProPak6 must be set with the identical network part and an acceptable machine part value (normally 2 – 254, and not already used by a different device).
Acceptable Configuration:
ETHCONFIG ETHA AUTO AUTO AUTO AUTO IPCONFIG ETHA STATIC 198.161.78.101 255.255.255.0 198.161.78.1 ICOMCONFIG ICOM1 TCP :3001
2.3.1 Setup for Windows FTP Client
Using the settings above, it is then possible to configure the receiver to accept Windows FTP Client access. First active the FTP Server on the ProPak6 using the following command:
IPSERVICE FTP_SERVER ENABLE
Now you will need to know the username and password. By default, the ProPak6 account is set to: Username: admin
Password: Enclosure PSN (found on the bottom of the receiver)
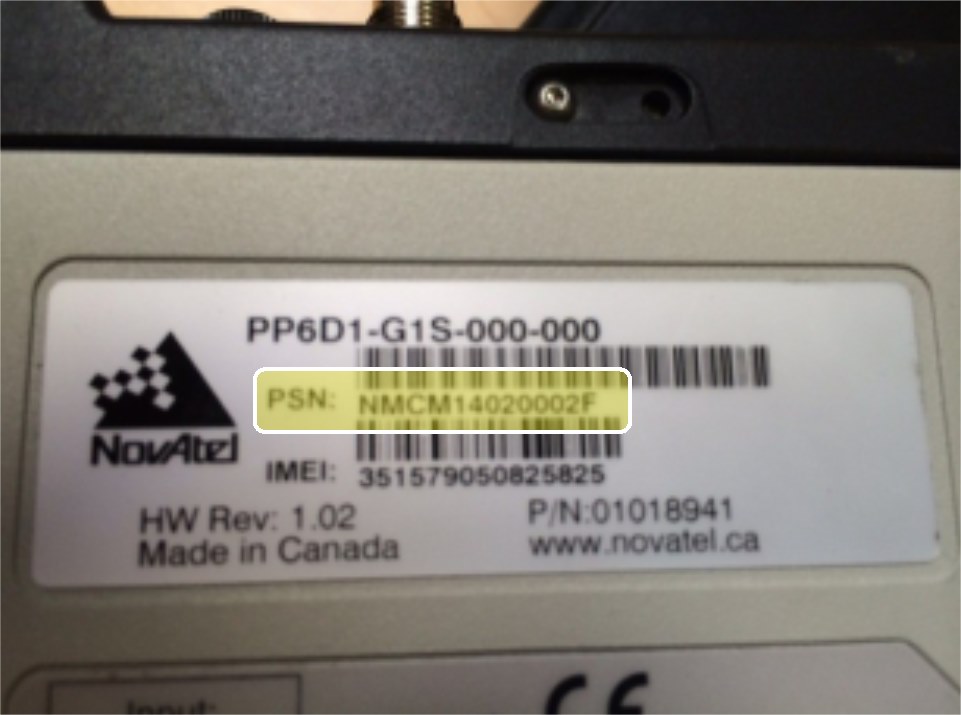 Figure 2: ProPak6 Enclosure PSN
This is also a good time to set your own unique password, especially if connecting the ProPak6 to a publically accessible network. This is possible through the following command:
SETADMINPASSWORD
Replace
Replace
Once connected, the FTP service will use standard DOS commands to manipulate the data on the ProPak6. These messages can be found below:
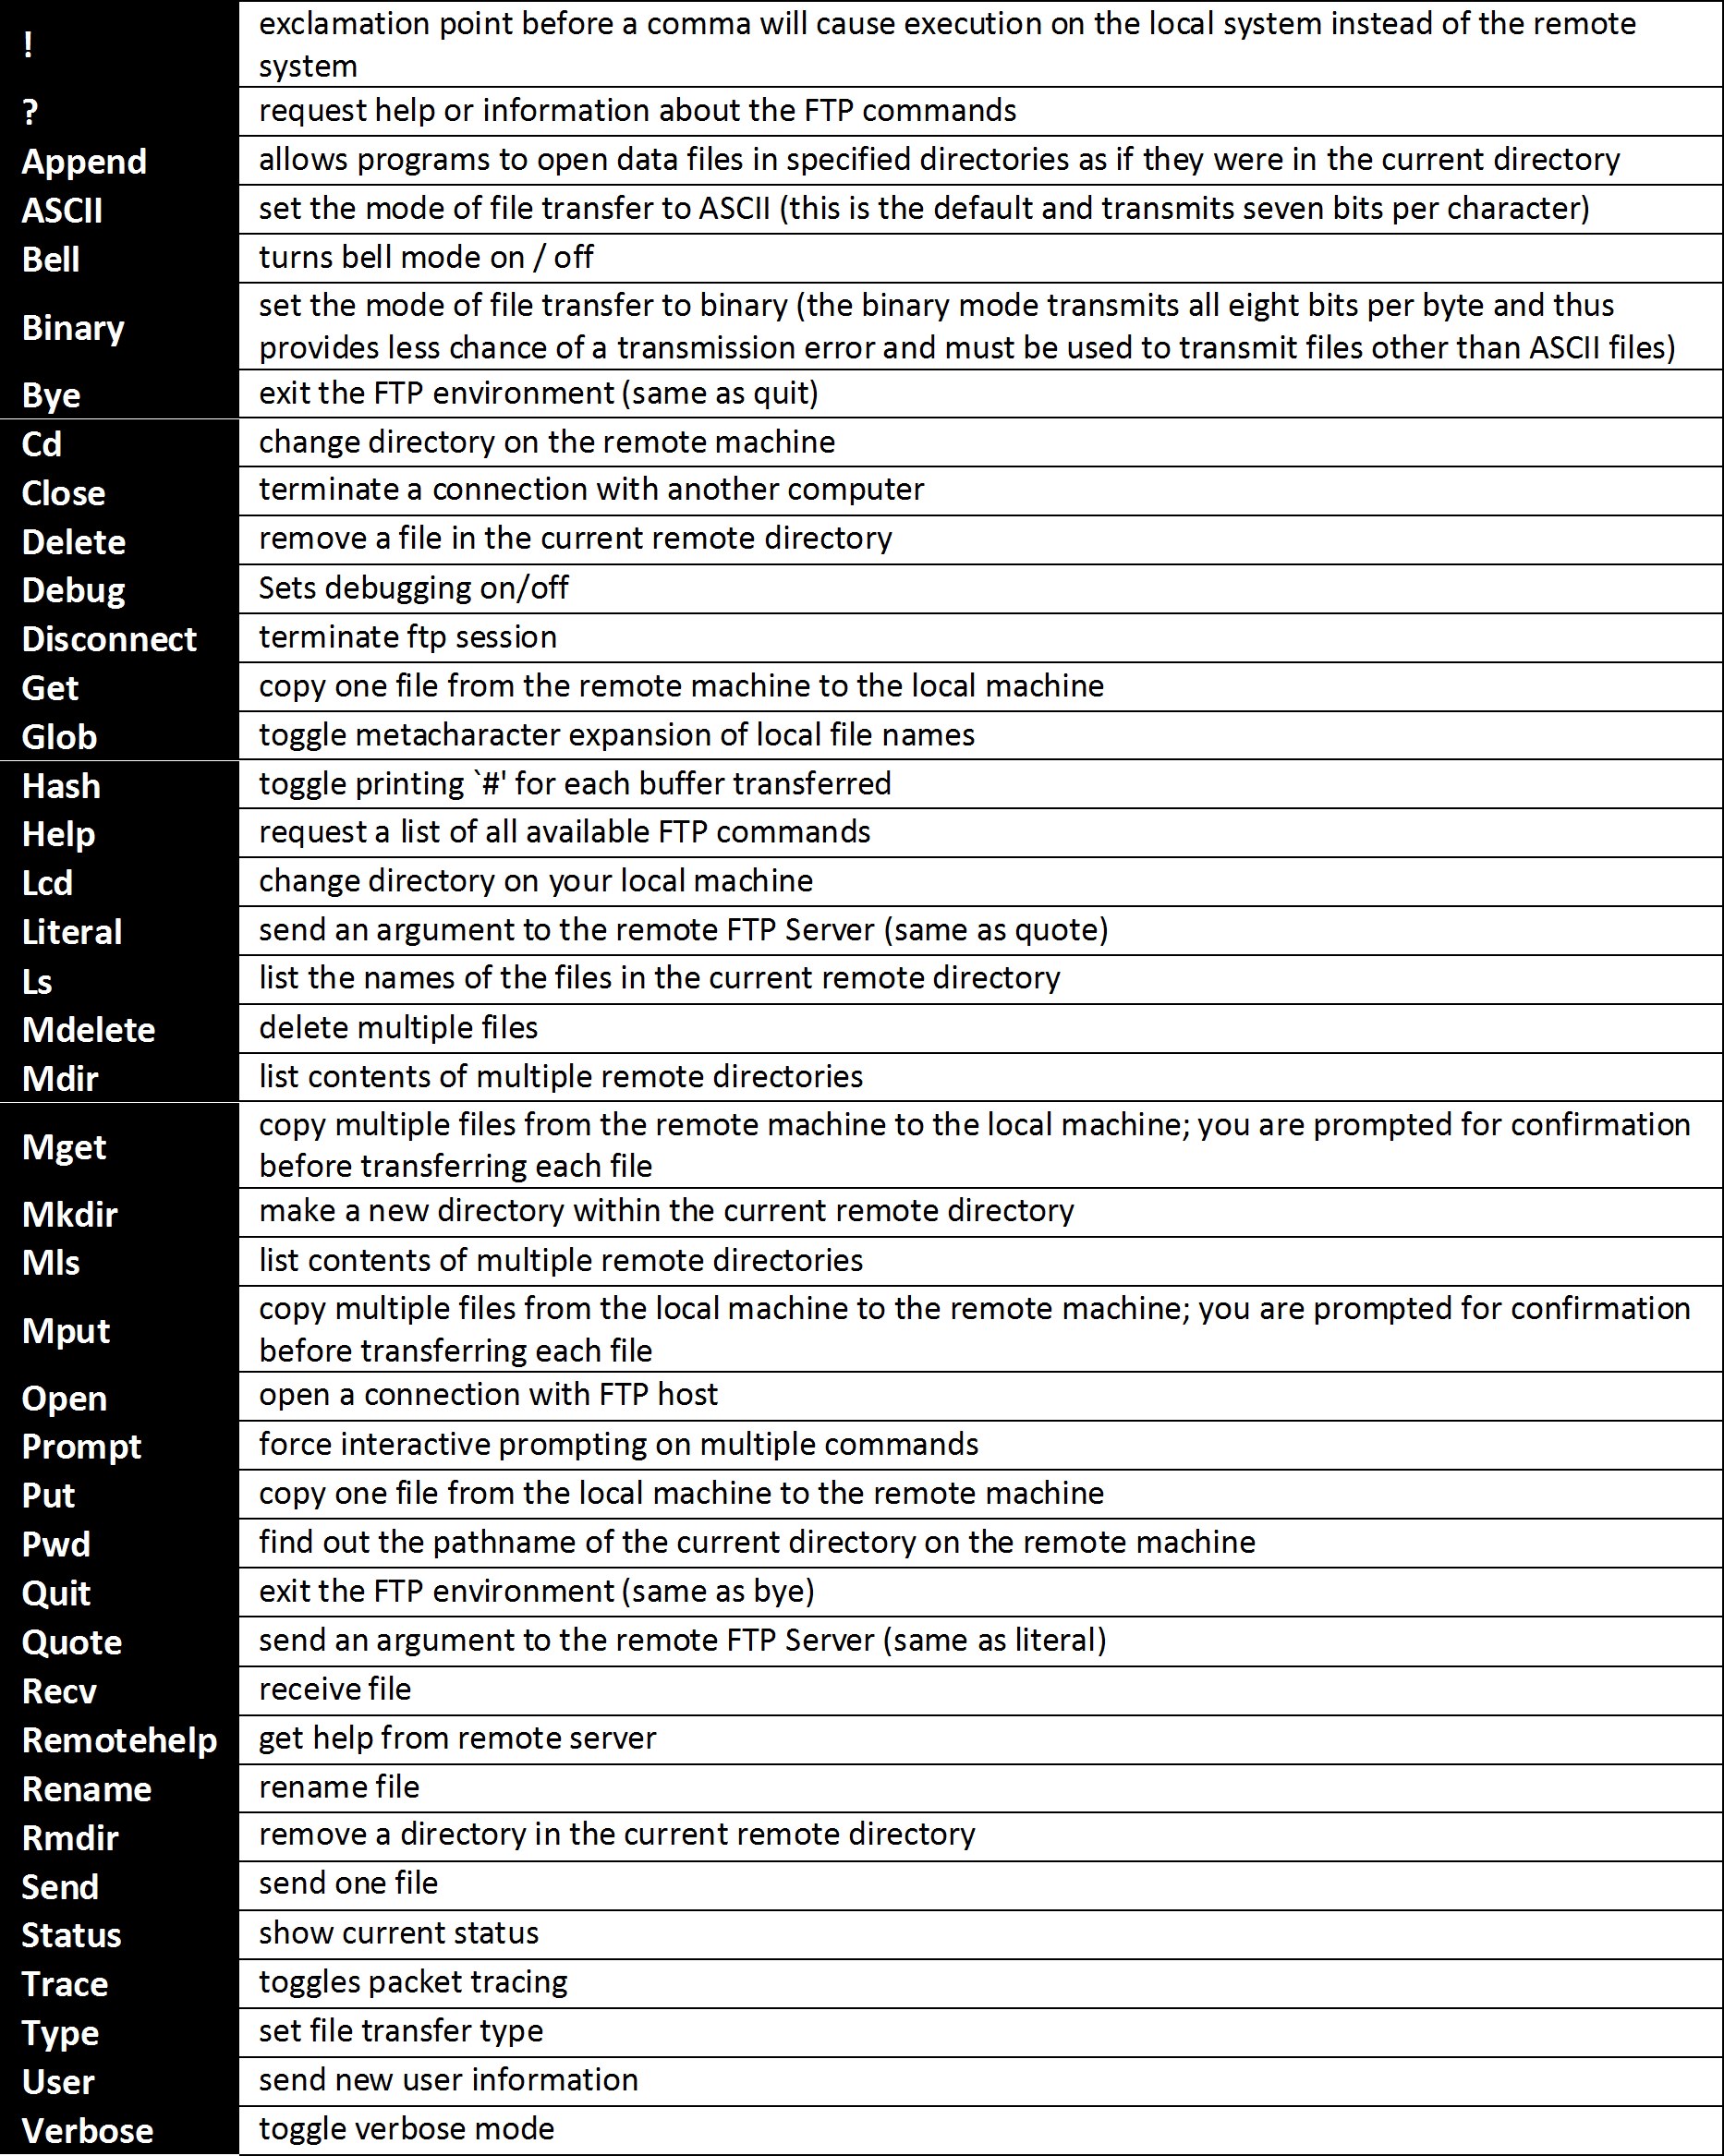 Figure 3: DOS FTP Commands

Example Connection and Data Transfer:
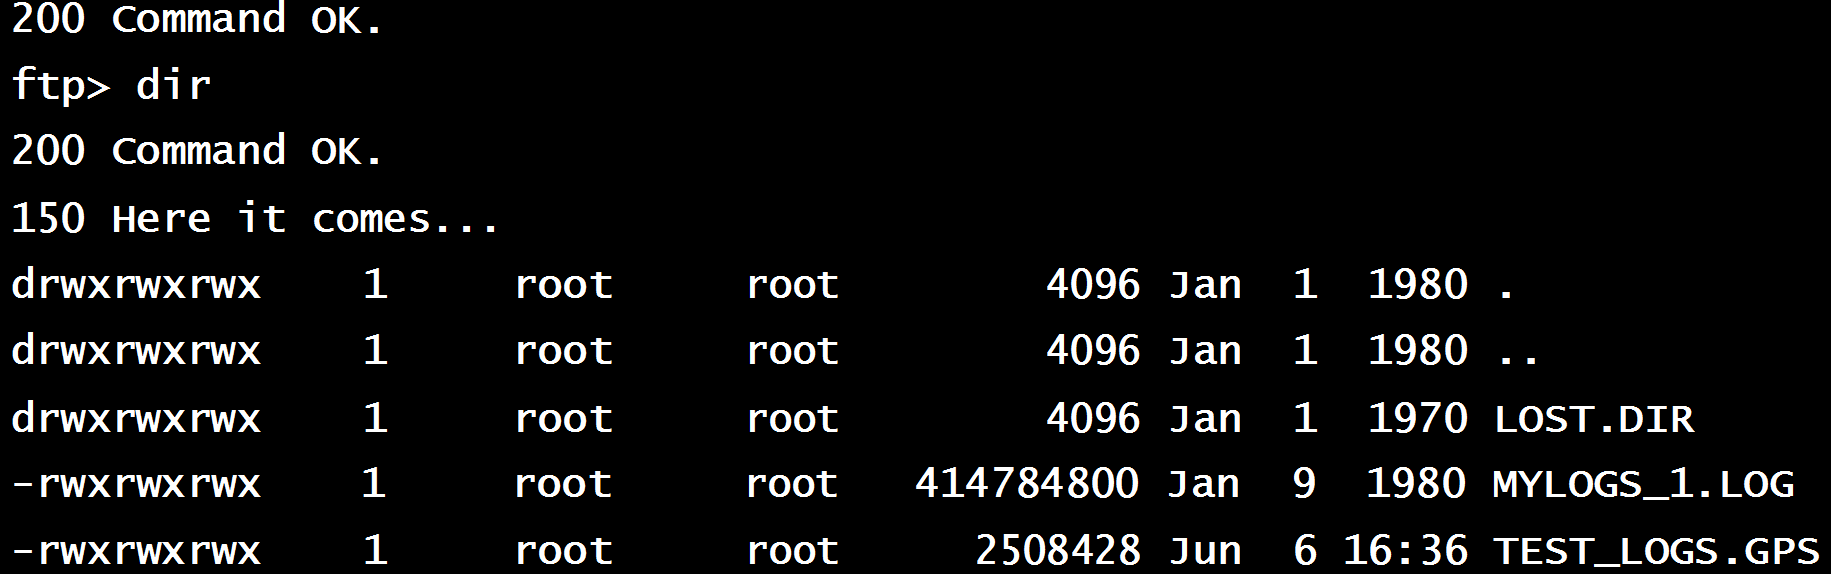
 Figure 4: Example Communication with CMD FTP
3. Third Party Software
It is also possible to access the ProPak6 via third party FTP services. The Host is the IP address of the ProPak6, the username is admin, using the defined password. The Port number is to be left blank as it will default to the FTP server, port 21:
 Figure 6: Connection Information - FileZilla
It is also important to remember to set to the transfer type in third party software to binary. Leaving the service in default (ASCII) may result in corruption of binary logs during download process.
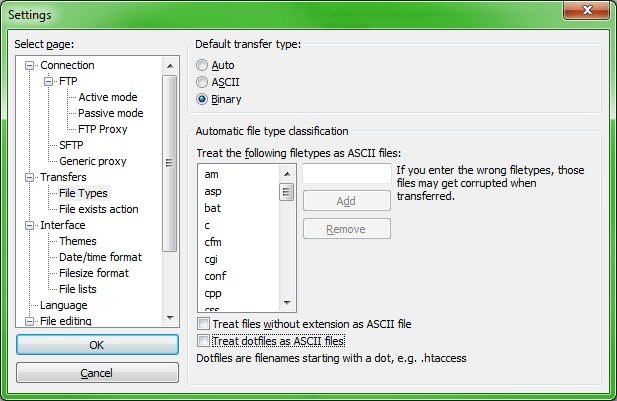 Figure 7: Binary Transfer Type Settings
Some users prefer this method of transfer to that of the standard FTP service built into Windows’ Command Prompt because you are able to observe transfer status and messages. An example of an established connection and file transfer in FileZilla is available below:
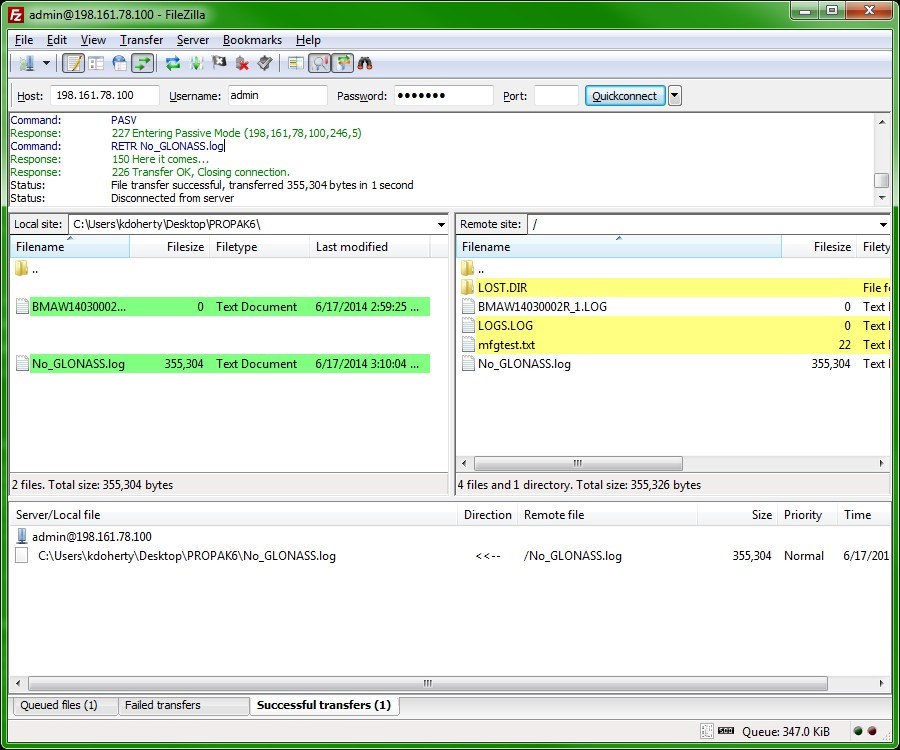 Figure 8: FileZilla File Transfer Example
4. Transferring Files to a Smart Phone
4.1 Wireless Access Point Configuration
To sync a smart phone with the ProPak6 for data transfer, configure the ProPak6 as an Access Point so that the cell phone can connect via Wi-Fi. This can be done via the following:
WIFICONFIG STATE ENABLED WIFICONFIG MODE AP
WIFIAPCONFIG 1 AUTHENTICATION OPEN WIFIAPCONFIG 1 SSID “PROPAK6_NETWORK” WIFIAPCONFIG 1 ENCRYPTION NONE WIFIAPCONFIG 1 IPADDR 192.168.1.1
Logging IPSTATUS will provide confirmation of the adapter IP, while logging WIFIAPCONFIG will reiterate the configuration that has been sent to the receiver:
LOG IPSTATUS
[COM1] < 3
< ETHA "192.168.1.101" "255.255.255.0" "192.168.1.1"
< WIFI "192.168.1.1" "255.255.255.0" ""
< CELL "" "" ""
< 1
< "0.0.0.0"
LOG WIFIAPCONFIG
[COM1] < 1 AUTHENTICATION "open"
< 1 SSID "ProPak6_Network"
< 1 ENCRYPTION "none"
< 1 IPADDR "192.168.1.1" [COM1]
Once Wi-Fi is enabled on the smart phone, search for the SSID assigned to the ProPak6. The cellular device must be set to a static IP address on the network, below are examples for Android and iPhone:
Confirmation of connection can be found by logging WIFIAPSTATUS and observing that the MAC address is present on the network: LOG WIFIAPSTATUS
< ENABLED "00:21:66:00:87:8A" 1 1
< "D8:96:95:0D:0F:DE" 54.0
[COM1]
In order to use a smart phone, an FTP client application must be present. There are various available through the application stores on major platforms. Once installed, the connection settings should follow the same general requirements as a PC based FTP client: Below are example connections established using both iOS and Android operating systems:
1.2 Cell Phone Settings
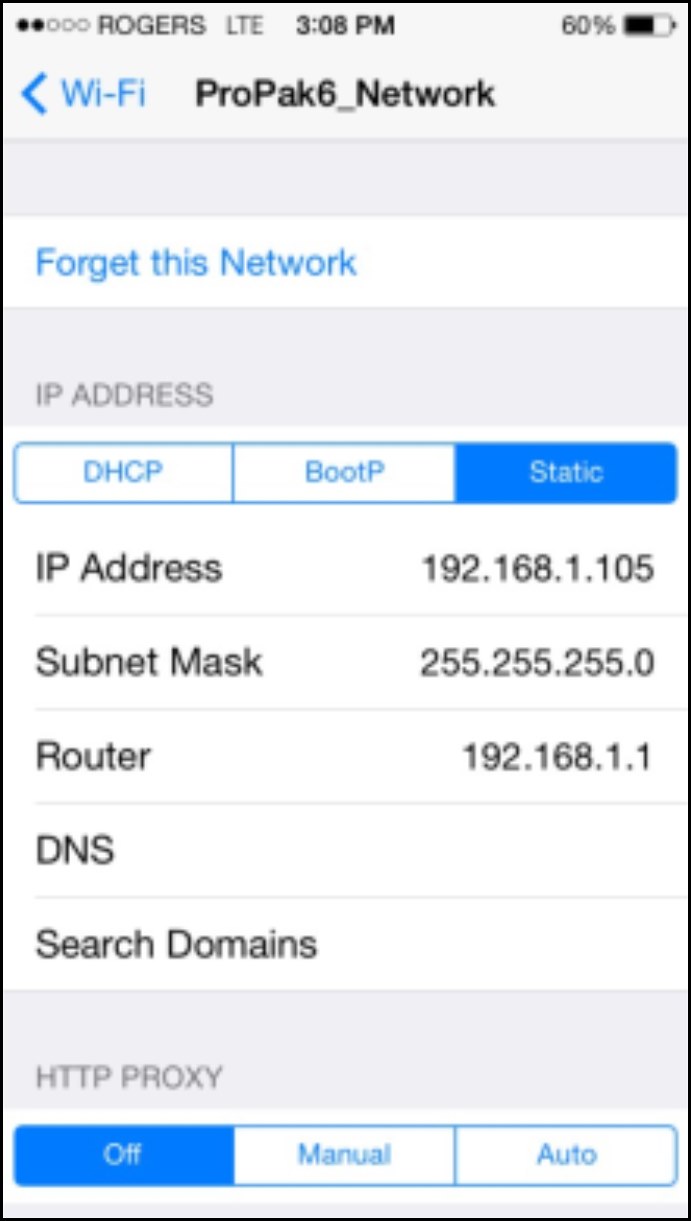
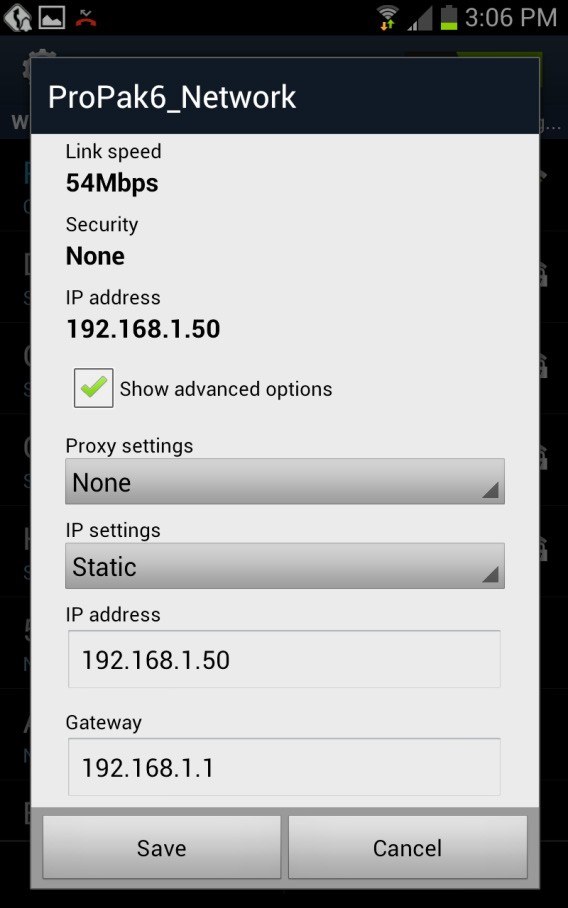 Figure 9: iOS Static IP Setup Figure 10: Android Static IP Setup
3. FTP Client Applications
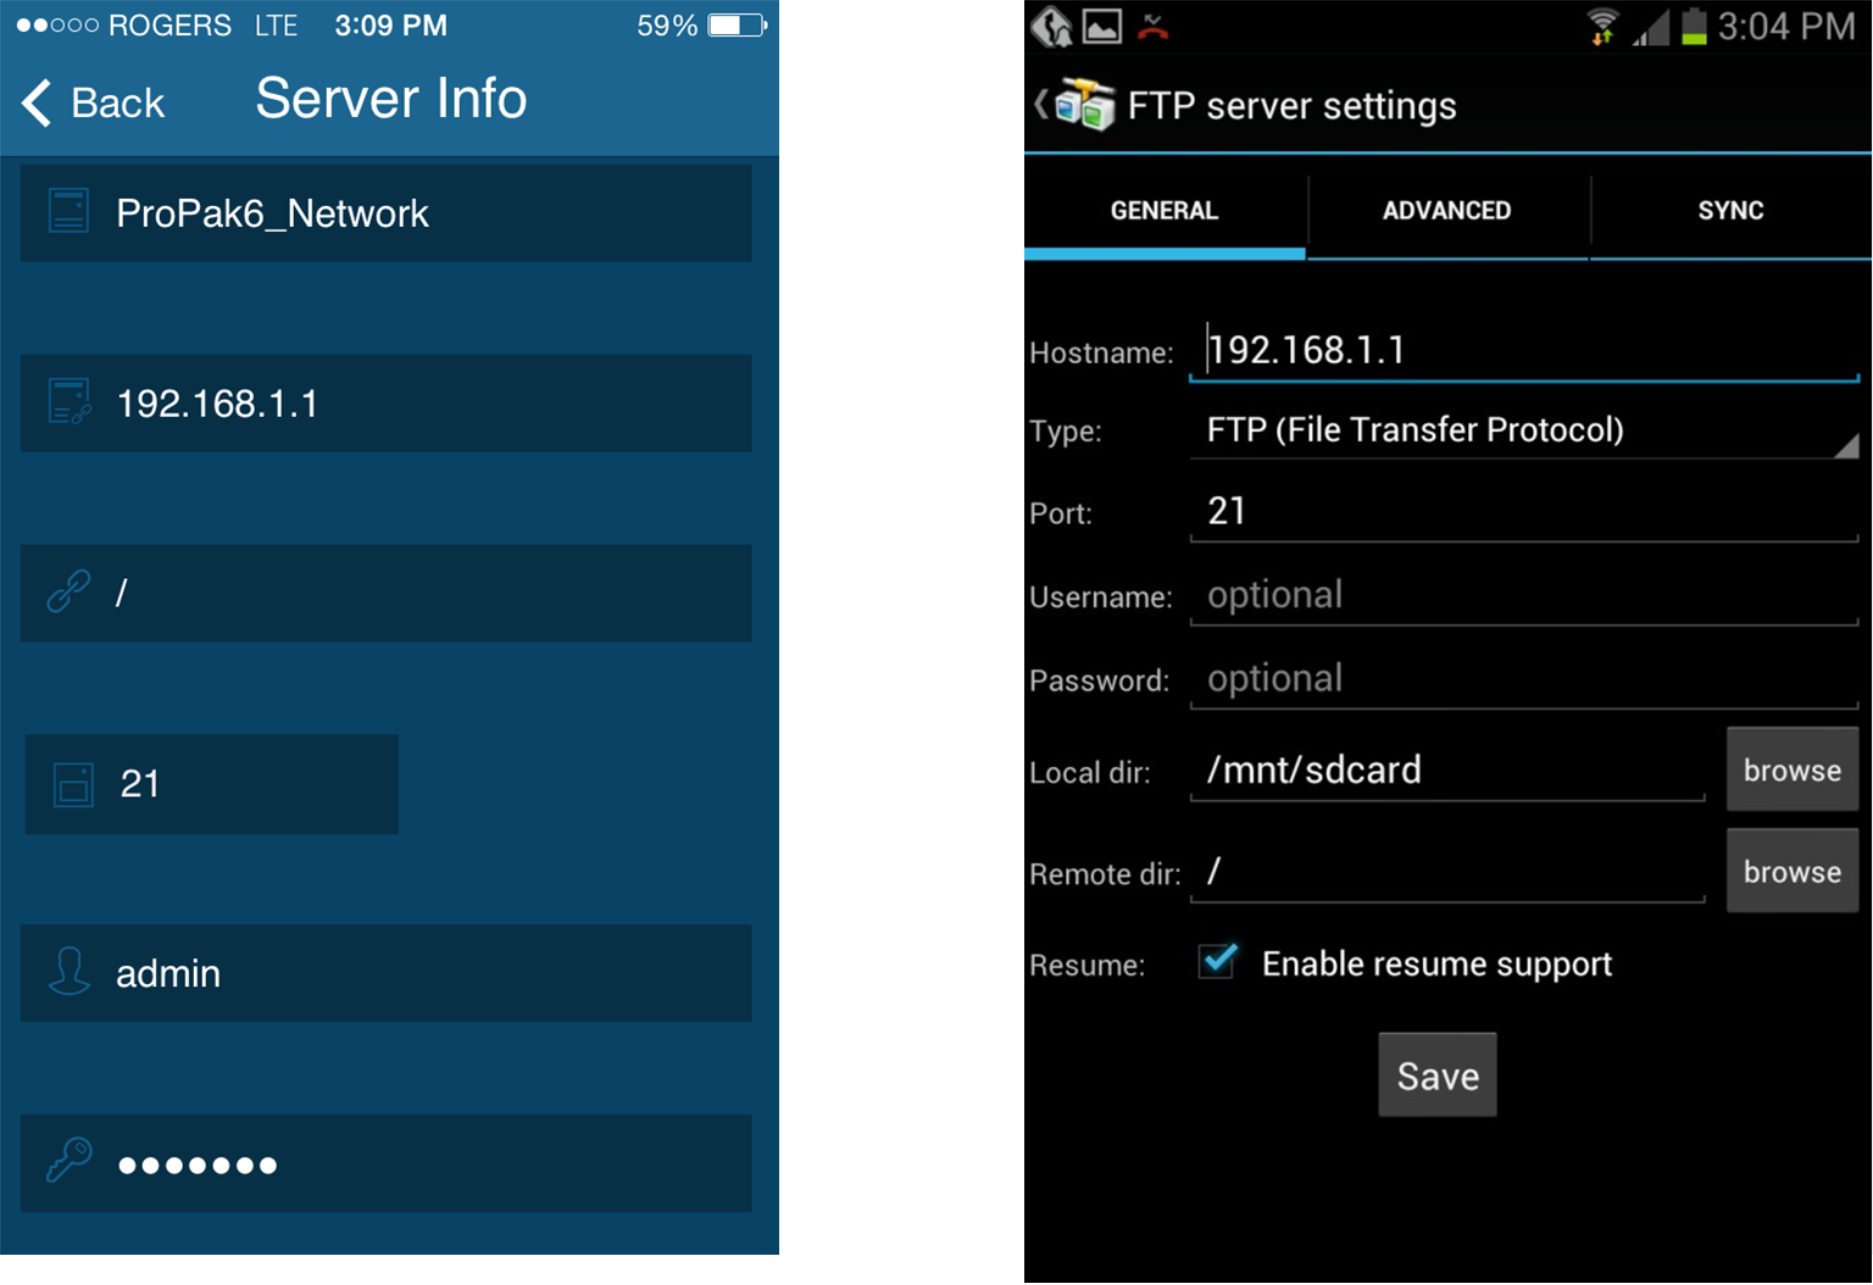 Figure 11: iOS FTP Client Setup Figure 12: Android FTP Client Setup
4. Connection and Data Transfer Examples
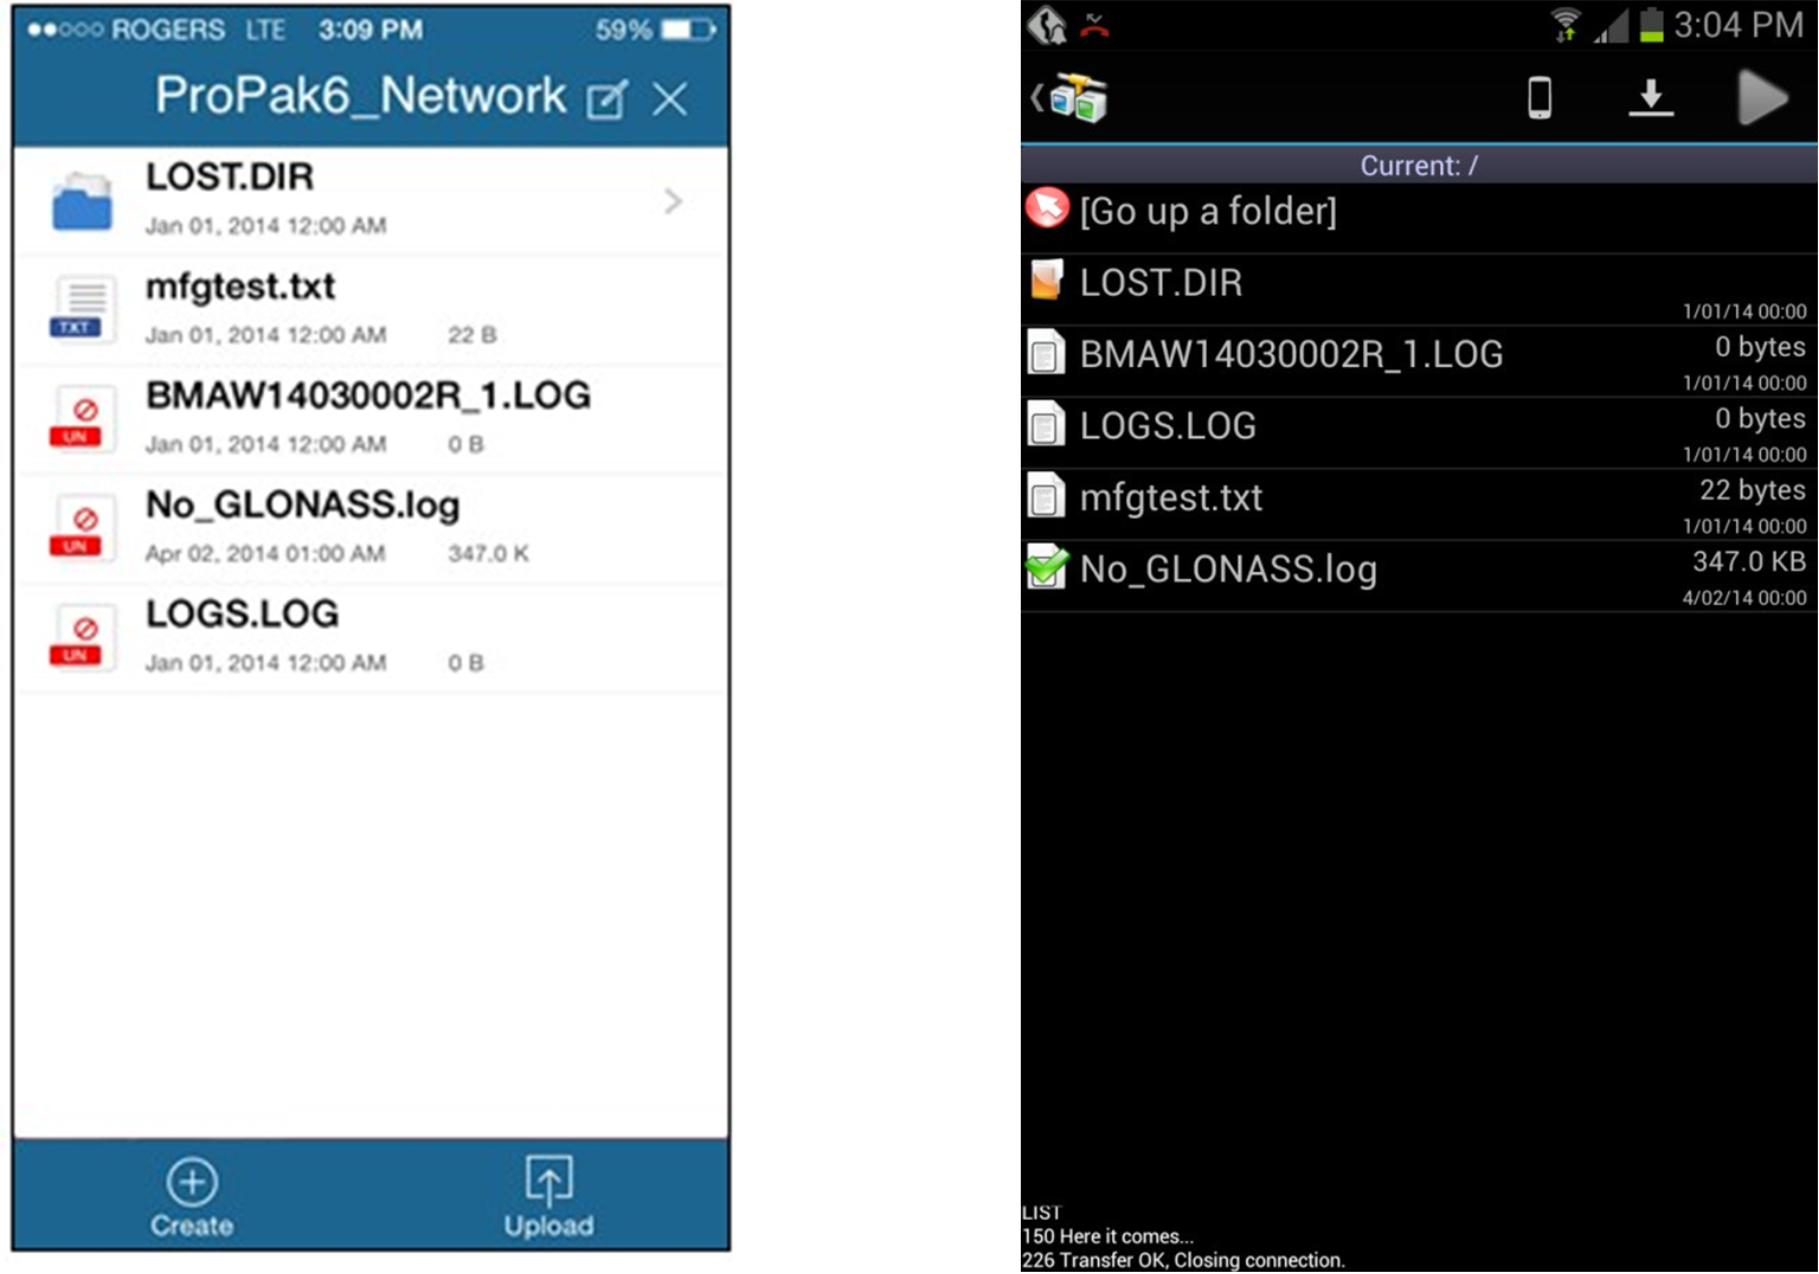 Figure 13: iOS FTP Connection to Propak6 Figure 14: Android FTP Connection to ProPak6